
Most people have a general sense of how traditional braces work: brackets, wires, periodic adjustments, and time. What’s less commonly understood is that not all brackets are the same, and the process behind LightForce clear braces is fundamentally different from how conventional brackets are made and fitted.
LightForce uses a fully digital workflow that produces custom-made brackets for each individual patient’s tooth anatomy. Understanding how that process works, from the initial scan through to the day the braces are placed, helps explain both why this system is different and what it means practically during treatment.
Step 1: The Digital Scan
The process starts with a digital scan of the teeth using an intraoral scanner, which captures a precise three-dimensional model of the patient’s dentition. This replaces traditional impressions made with trays and impression material.
The scanner moves through the mouth and builds a detailed 3D image in real time. The resulting model is accurate to fractions of a millimetre and captures the exact contours of each tooth surface, including the curved and irregular anatomy of the lingual (back) face of each tooth where the bracket will bond.
At Mission Creek Orthodontics in Kelowna, this scan becomes the foundation for everything that follows in the LightForce workflow.
Step 2: Digital Treatment Planning
The 3D tooth model is imported into treatment planning software, where the orthodontist designs the full course of treatment digitally. Each tooth’s target position is mapped out: how much it needs to move, in which direction, and in what sequence relative to the other teeth.
This is not fundamentally different from what orthodontists do conceptually with any braces case, but the digital format allows for a level of precision that manual bracket placement cannot consistently achieve. The planned final positions are defined before a single bracket is placed, and the bracket design is then reverse-engineered from those targets.
This planning stage is where the expertise of a certified specialist in orthodontics shapes the outcome. The software is a tool. The clinical decisions about tooth positions, root angulation, bite correction, and treatment sequencing still require the knowledge and judgment that come from specialist training.
Step 3: Custom Bracket Fabrication
Once the treatment plan is finalized, it’s sent to the LightForce manufacturing facility, where the brackets are 3D printed in a ceramic material to match each tooth’s anatomy. Every bracket is shaped to sit precisely on the specific tooth it was designed for, rather than being selected from a standard size range and manually positioned.
The base of each bracket, the part that bonds to the tooth, is contoured to match the exact curvature of that tooth’s surface from the scan. The slot angles built into the bracket encode the target tooth position. This means the bracket itself carries information about where the tooth needs to go.
Standard brackets are manufactured to general specifications and then positioned by hand during bonding. The accuracy of conventional bracket placement depends substantially on the skill and care of the clinician at that appointment. With LightForce, a significant portion of the positioning information is built into the bracket before it arrives at the clinic.
Step 4: Custom Bonding Trays
Along with the brackets, the LightForce workflow produces custom bonding trays that hold each bracket in its precisely planned position during the bonding appointment. These trays are also fabricated from the digital scan and treatment plan.
During bonding, the tray guides each bracket to the exact location on the tooth where it was designed to sit. This removes one of the more variable steps in conventional bracket placement and makes the transfer from digital plan to physical reality more accurate.
Step 5: Bonding Appointment
The bonding appointment for LightForce braces proceeds similarly to conventional braces in terms of the experience for the patient. The teeth are prepared, the bonding trays are positioned, the brackets are cured in place, and the initial archwire is inserted.
Because the brackets are positioned by the bonding trays rather than by hand, the appointment can run efficiently. The clinical precision is built into the process rather than relying entirely on manual positioning at the chair side.
After bonding, the wire begins working against the programmed bracket positions to move the teeth toward their planned locations.
What This Means During Treatment
The practical implications of this workflow show up as treatment progresses. Because each bracket is designed for a specific tooth with specific positional information encoded into it, the archwires can do more of the work that would otherwise require bracket repositioning in a conventional case.
In standard braces, repositioning brackets mid-treatment is common when the initial placement needs adjustment or when more precise tooth positioning is needed in the later stages. With LightForce, the intent is that the bracket positions built from the digital plan reduce the frequency of these corrections.
This doesn’t mean LightForce treatment requires no adjustments. Orthodontic treatment is biological and individual. How quickly teeth respond to force, how bone remodels, and how the bite develops through treatment are all variables that no digital system eliminates. The orthodontist monitors progress at each appointment and makes clinical decisions throughout.
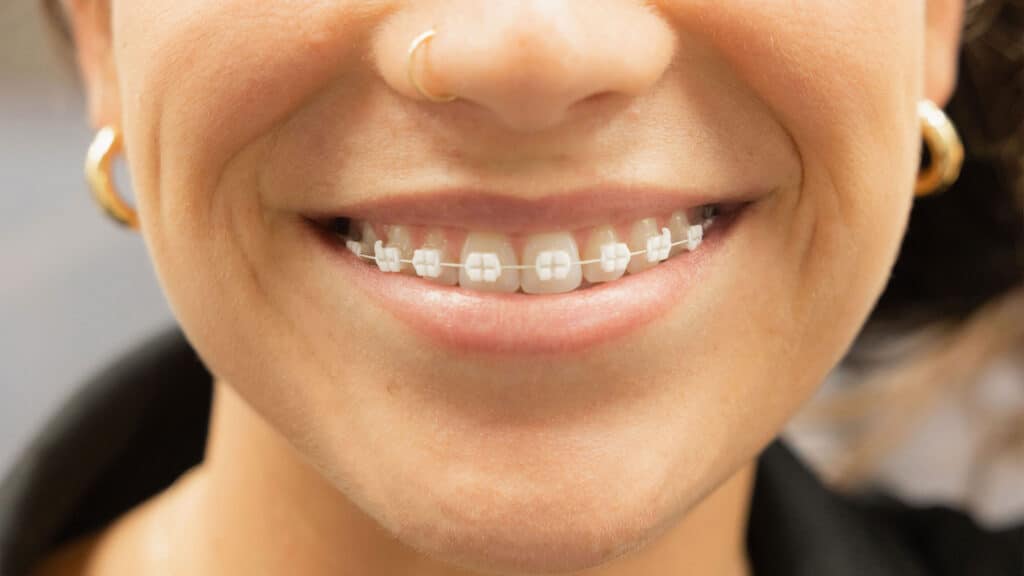
LightForce as a Clear Braces Option
LightForce brackets are made from a translucent ceramic material, which makes them significantly less visible than metal brackets. For adult patients or teens who want the clinical precision and reliability of braces without the visual prominence of metal, LightForce provides a middle ground between conventional clear braces and aligner treatment.
Unlike conventional ceramic brackets, which are manufactured in standard shapes and then placed manually, LightForce brackets are custom-made, which means the reduced visibility comes without compromising the precision of the bracket positioning.
Patients considering Invisalign versus LightForce braces can discuss both options at a consultation. The right choice depends on the complexity of the case, patient compliance factors, and personal preference. Some cases are well-suited to either option; others favour one approach over the other based on clinical specifics.
About Mission Creek Orthodontics
Mission Creek Orthodontics is located at 3975 Lakeshore Rd, Unit 202, Kelowna, BC, and serves patients across the Central Okanagan. The practice is led by three certified specialists in orthodontics: Dr. Derek Pollard, Dr. Diego Diaz, and Dr. Jessica Kehler. No referral is required to book a consultation, and interest-free payment plans are available.
Book a LightForce Consultation at Mission Creek Orthodontics
If you’d like to learn more about LightForce clear braces and whether they suit your treatment needs, Mission Creek Orthodontics is accepting new patients in Kelowna.
Call (778) 477-5770 to book your free consultation. No referral needed.
- Book a LightForce braces consultation at Mission Creek Orthodontics
- Call us to compare LightForce clear braces and Invisalign for your case
- Schedule a free orthodontic consultation at our Lakeshore Rd location in Kelowna
- Contact Mission Creek Orthodontics to ask about clear braces for adults or teens
- Request your free consultation with our Kelowna orthodontic specialists today